
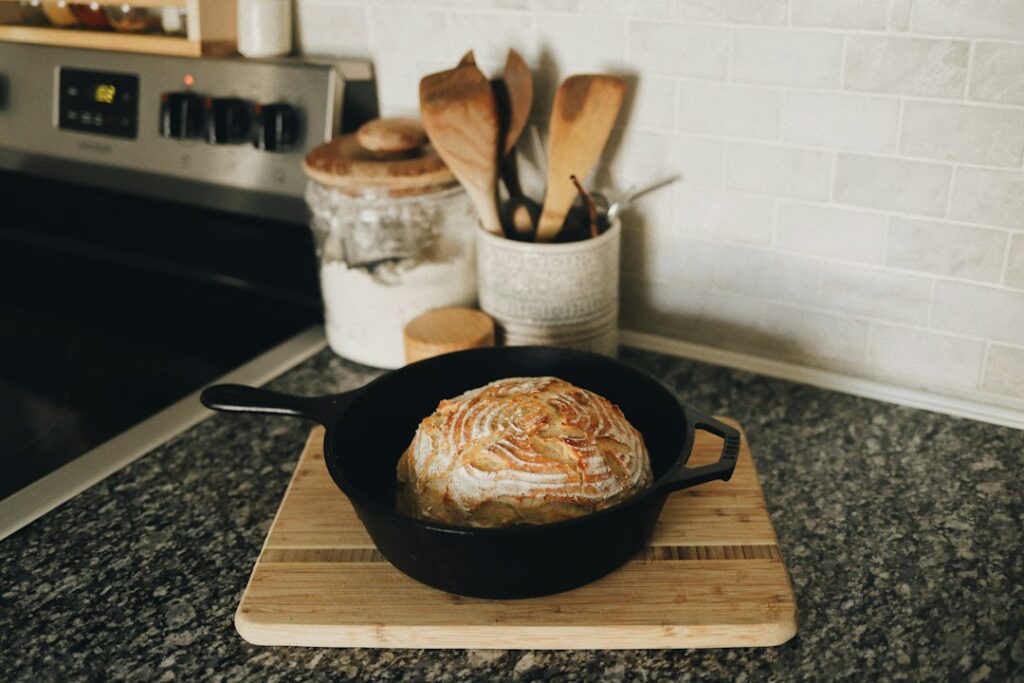
If you love durable cookware that gets better with use, the phrase cast iron skillet care is about to become one of your most valuable kitchen mantras. With a few steady habits, a cast iron skillet can develop a slick, resilient surface, cook evenly for years, and handle everything from blistered steaks to golden cornbread. This guide shows how to build, protect, and maintain that performance with step-by-step methods, practical checklists, and calm troubleshooting.

cast iron skillet care basics: essentials at a glance
Cast iron rewards routine and patience. It isn’t complicated, but it does like consistency. Here are the core ideas that make everything else in this guide click:
- Seasoning is a thin, baked-on oil film that bonds to bare iron. Thin coats and sufficient heat make it strong and smooth over time.
- Cleaning is gentle and quick. Warm water and a soft tool remove residue; aggressive scrubbing is for resets, not daily care.
- Drying and oiling finish the job. Heat chases away moisture. A whisper-thin oil film helps the surface stay dark, even, and slick.
- Cooking reinforces seasoning. Heat plus fat lays down microscopic layers. Early on, choose foods that help the surface develop.
- Rust or stickiness can be fixed. Calm resets and thin seasoning cycles bring a pan back from rough patches.
Keep those five points in mind and you’ll steer clear of most frustrations. The rest of this article adds detail so you know what to do in real kitchens, with real messes and real schedules.
Choosing a skillet: size, weight, and material options
Before we talk maintenance, set yourself up with a skillet you’ll use often. A pan that fits your stove, meals, and grip will see far more action and will build a better surface faster simply because it’s in play. Consider the following factors when selecting a cast iron skillet.
Diameter, depth, and how many you feed
- 8–9 inches: Ideal for single-serve meals, fried eggs, grilled cheese, and small side dishes. Heats quickly and is easy to maneuver.
- 10–10.5 inches: The versatile sweet spot for many home cooks. Good for two to three people, smash burgers, sautéed vegetables, and pan pizzas.
- 12 inches: Spacious enough for family dinners, large steaks, and stir-fries, but heavier to lift and slower to preheat.
- Deep-walled “chicken fryer” pans: Useful for shallow frying, braises, and recipes that benefit from tall sides and moisture retention.
Weight, handles, and balance
Pick up the skillet before you buy. If you cannot comfortably lift and tilt it when empty, it will feel twice as heavy when full. Look for a secure primary handle and a sturdy helper handle opposite it. An ergonomic grip makes pouring, transferring, and cleaning safer and simpler, which means you won’t avoid using the pan.
Enameled versus bare cast iron
- Enameled cast iron has a glassy coating inside and out. It doesn’t build a traditional seasoning layer, resists reactivity with acidic foods, and stores with less maintenance. It behaves more like stainless steel inside and benefits from a touch of oil for release.
- Bare cast iron is the classic black skillet. It needs regular drying and a microfilm of oil after washing. In return, it can develop a simple, durable surface that is remarkably resilient for searing and roasting.
Both belong in many kitchens. If you want the highest-heat sears and a pan you can “train,” choose bare cast iron. If you simmer tomato sauces for hours, enameled cast iron is handy. Plenty of cooks keep both for flexibility.
What seasoning really is and how to build it
Seasoning is not a thick coat of oil; it’s a thin, heat-bonded finish created when a tiny amount of fat reaches temperatures high enough to reorganize its molecules and cling to the iron. Multiple thin coats are far tougher than one heavy, sticky coat. Understanding this helps you build a finish that looks quietly satin and cooks with confidence.
Good oil choices for seasoning
Most neutral cooking oils work when applied thinly. What matters most is restraint and heat. Common, reliable picks include:
- Grapeseed oil: Neutral aroma, consistent performance.
- Canola or vegetable oil: Inexpensive and dependable for repeated cycles.
- Avocado oil: High heat tolerance; a fine option if already in your pantry.
- Flaxseed oil: Darkens fast but very thin coats are crucial. Thick application can chip later.
Initial seasoning: a step-by-step routine
- Wash, then heat-dry. Remove factory dust or shipping residue. Heat the empty pan for a minute to drive away hidden moisture.
- Apply a near-invisible film of oil. Drip a few drops, wipe them across every surface inside and out, then buff with a fresh towel until the pan looks dry, not glossy.
- Bake upside down for 60 minutes at 450–500°F (230–260°C). Lay foil on a lower rack to catch any faint weeping.
- Cool in the oven. Turn off the heat and let the pan return to room temperature inside the oven to limit condensation.
- Repeat 2–3 times. Thin, patient coats create a durable foundation that daily cooking will continue to strengthen.
This sequence establishes a base layer that resists sticking and rust. Early cooks that combine heat and fat—pan pizza, roasted potatoes, bacon, sausages—add microscopic reinforcement and make the pan perform better, faster.
Cleaning without stripping the finish
Cleaning a cast iron skillet should be quick and un-fussy. The aim is to remove food and oil residues without sanding away your hard-earned film. The best move is often the simplest: clean soon after cooking, use warm water, use gentle tools, and finish with heat and a hint of oil.
Right after cooking
- Let the pan cool a bit. Handling very hot iron is risky and unnecessary. Wait until it’s warm but safe.
- Wipe out loose bits. A paper towel or spatula clears crumbs and leftover oil before rinsing.
- Rinse with warm water. If the pan is still slightly warm, stubborn spots soften quickly.
- Use a gentle tool. A soft brush, non-scratch scraper, or chainmail scrubber loosens stuck-on areas. Reserve harsh abrasives for deliberate resets, not daily care.
Soap, salt, and other helpers
A small amount of mild dish soap used sparingly on a mature surface is fine. Early on, when seasoning is young, lean on warm water and a soft brush. Coarse salt can act as a mild abrasive for stuck areas: sprinkle, add a few drops of water, scrub gently, rinse, then dry and oil.
Don’t soak
Extended soaking invites rust. Rinse, scrub gently, then move to the drying and oiling routine. That final minute is what keeps your pan looking deep black and feeling smooth.
Drying and oiling: your 60‑second habit
Water is the enemy of bare iron left alone, and a friend when followed immediately by heat and a microfilm of oil. This routine is the single most powerful habit in cast iron care and takes about a minute.
- Heat to dry. Put the cleaned skillet over medium heat. In a minute or two, lingering droplets vanish and the surface looks matte and dry.
- Apply and buff a few drops of oil. While warm, rub in 3–4 drops of neutral oil using a paper towel, then buff again with a fresh towel until the pan looks dry, not greasy.
- Let it cool on the stove. As the pan cools, a microscopic film settles and hardens. Over weeks and months, this habit gives the surface a quiet sheen and consistent release.
If you ever see a visible oily gloss, you used too much. Buff again until the gloss disappears. Thin, nearly invisible is the target every time.
Troubleshooting: rust, stickiness, and flaking
Cast iron is forgiving. Most issues trace back to moisture lingering, oil applied too thickly, or uneven heat. Each problem has a calm, simple fix.
Sticky or gummy patches
Cause: Too much oil was applied at once or not buffed thoroughly. Fix: Scrub gently with warm water and a non-scratch pad to lift tackiness. Dry with heat, apply a tiny amount of oil, buff until dry-looking, then bake at 450–500°F (230–260°C) for 45–60 minutes. Cool in the oven. Repeat once if needed.
Orange rust specks or patches
Cause: Moisture lingered after washing or the pan sat in a damp spot. Fix: Use a chainmail scrubber or fine non-scratch pad with warm water to remove orange areas until dull gray appears. Heat to dry thoroughly, apply a micro-coat of oil, buff, then run one or two seasoning bakes to rebuild the film.
Flaking or patchy seasoning
Cause: Heavy coats or uneven heat produced a brittle layer. Fix: Scrub to remove loose flakes. For stubborn areas, a mild baking-soda paste adds gentle abrasion. Rinse, dry with heat, then perform two to three ultra-thin seasoning cycles, baking the pan upside down each time.
Severe thrift-store rescues
Pans with heavy rust or paint-like buildup need patience. Extended scrubbing sessions and multiple seasoning bakes bring most finds back to cooking shape. The key is consistency: thin coats, adequate heat, and calm repetition.
Cooking that improves the surface
Your cooking choices can help the pan’s surface improve faster. In early weeks, give the skillet tasks that combine heat and fat. As the film matures, you can cook almost anything with confidence.
Surface-building ideas
- Steaks and chops: Preheat until a drop of water skitters, add a thin oil film, and let the crust form before turning. The heat and fat lay down reinforcing layers.
- Pan pizza: Lightly oil the pan, press in dough, top, and bake. High heat plus oil strengthens the finish and the pizza releases beautifully.
- Roasted potatoes: Toss in oil and seasonings, spread, and roast. Crisp edges for dinner, better surface for your pan.
- Bacon and smash burgers: These classics deliver plenty of fat to help the film harden and smooth out early on.
Foods to approach when the layer is mature
- Acidic sauces: Quick tomato cooks on a mature surface are fine, but long acidic braises are better in enameled cast iron.
- Delicate eggs on a brand-new pan: Give the skillet a few weeks of use first or use a bit more fat and careful preheating.
Over time, even delicate foods behave well if you preheat, manage fat, and resist impatience while the food naturally releases.
Mistakes to skip and why they happen
Cast iron is tough, yet common misunderstandings create extra work. Avoid these pitfalls and your skillet will require less hands-on maintenance.
- Heavy oil during seasoning: Thick application turns sticky and later flakes. Wipe until the pan looks dry, then bake.
- Skipping the heat-dry step: Most rust starts with moisture trapped on the surface. Heat-dry after every wash.
- Storing food in the pan: Leftovers trap moisture, soften seasoning, and can impart off flavors. Transfer food to containers promptly.
- Over-scrubbing daily: Save the harsh tools for resets. Warm water and gentle tools handle daily messes without wearing down the film.
- Expecting Teflon release from day one: Cast iron improves with use. Early cooks need a touch more fat and patience; later, the pan glides.
- Oiling a cold pan post-wash: Oil spreads and bonds better on warm metal. Warm, oil, buff, cool—keep that sequence.
- Damp storage: Humidity sneaks under the film. Choose dry, airy storage and, if stacking, add a paper towel between pans.
Every item on that list has an easy alternative: thin coats, gentle cleaning, heat-drying, and dry storage. Keep those in mind and your maintenance should feel straightforward.
Storage, travel, and long breaks
Cast iron thrives when it can breathe. Whether you store it on a rack, in an oven, or in a cabinet, consider airflow and humidity. A little foresight prevents most headaches.
Daily storage at home
- Open racks: Spacing pans allows air to circulate and discourages moisture from lingering.
- Inside the oven: Many cooks store skillets in the oven to keep them dry. If you do, either remove them before preheating or let them warm gradually with the oven to avoid sudden thermal shock.
- Stacking strategy: If space requires stacking, place a paper towel, felt protector, or thin cloth between pans to reduce friction and trap minor humidity.
Travel and camping
When packing a skillet, wrap it in a towel or cloth to absorb humidity and protect surfaces from scratches. After a rainy trip, wash, heat-dry, add a whisper of oil, and do one seasoning bake at home if the surface looks dull. That single cycle resets the pan’s even sheen.
Long breaks
If you won’t use the pan for weeks, give it a microfilm of oil after a heat-dry session and store it in a dry place. When you return, a quick warm-up and wipe restores its ready-to-cook feel.
Maintenance rhythms: weekly to quarterly
Small, steady routines beat dramatic resets. Use these rhythms to keep your skillet humming with minimal effort.
Weekly (or every few cooks)
- Scan for dull or gray areas. If you spot them, run one quick seasoning bake.
- Plan one “surface-building” cook like roasted potatoes, pan pizza, or a steak sear.
- Audit your post-wash habit: warm, oil, buff, cool. If you skipped a step, rebuild the routine.
Monthly
- Give the skillet a thorough warm-water scrub with a non-scratch pad to lift invisible residues.
- Perform a single ultra-thin seasoning pass if the sheen looks uneven.
- Inspect the underside and handle for rust freckles; wipe, oil, and heat if needed.
Quarterly
- Do a full-condition check: interior, exterior, and rim. Address any orange tinge immediately.
- Audit storage. If humidity is high, place a small desiccant pack near cookware in the cabinet.
- Clean stove grates or oven racks where the skillet sits; residue there can transfer to the pan’s base.
These routines sound formal, but in practice they take minutes and keep your skillet on an upward trajectory.
Tools, myths, and practical FAQs
A few simple tools make cast iron maintenance easier, and clearing up myths makes it less intimidating. Below are pragmatic picks and straight answers derived from everyday cooking.
Helpful tools
- Chainmail scrubber: Effective for loosening stuck-on bits without gouging the finish when used gently.
- Plastic pan scraper: A go-to for nudging caramelized edges off a warm skillet.
- Soft-bristle brush: Handles day-to-day cleaning in corners and along the rim.
- Linen or paper towels: Let you apply oil in micro amounts and buff aggressively when needed.
- Neutral oil bottle near the stove: Convenience encourages the post-wash habit.
Myths that deserve retirement
- “Soap is forbidden.” Not necessarily. On a mature surface, a small amount of mild soap used sparingly is fine. Follow with heat and a microfilm of oil.
- “You can’t use metal utensils.” You can, with reasonable technique. A flat metal spatula is a cast iron classic. Avoid hacking motions, especially on new seasoning.
- “Cast iron heats evenly from cold.” It heats retentively, not instantly evenly. Preheating matters. Give the pan time, then enjoy its consistency.
- “Acids ruin cast iron.” Long acidic cooks can soften a young layer. Mature seasoning and short acidic cooks are usually fine. Use enameled cast iron for long simmering.
Common questions
- How hot is too hot? Cast iron handles high heat, but the finish prefers controlled heat. Preheat gradually. For seasoning bakes, use the high-heat ranges described earlier.
- Which stovetops work? Gas, electric, and induction all work. On induction, increase heat gradually to reduce hot spots; on glass tops, lift rather than slide.
- How do I handle oil smoke during seasoning? Ventilate, use very thin coats, and consider a higher smoke point oil. Thin films reduce smoke and build stronger layers.
- What about enameled interiors? Enameled cast iron doesn’t build traditional seasoning. A thin swipe of oil before cooking still helps release, but the maintenance routine is lighter.
If you want additional, step-by-step technique guides and kitchen routines that work at home, explore more tips at HealthyCookingHub.com. Building a few solid habits turns cast iron into a daily driver that keeps improving with use.
Induction, gas, electric: heat management by stove type
Different heat sources behave differently under cast iron. Adjusting your approach by stove type helps you get consistent results and protects your finish.
Induction
Induction is fast and precise. Preheat gently to reduce hot spots, then raise to target heat. If your pan develops a visible hot ring, shift the pan slightly or lower heat until the temperature equalizes. Use a slightly lower setting than you would on gas; the pan’s heat retention fills the gap once hot.
Gas
Gas flames can lick up the sides, creating hot zones near the rim. Choose a burner that matches the skillet’s base and center the pan. If edges run hotter than the middle, lower the flame or move the pan slightly. For searing, preheat over medium, then raise heat for the final moments before adding food.
Electric (coil or glass)
Electric elements heat more slowly and respond more slowly. Preheat patiently. On glass-topped stoves, lift the skillet to move it rather than sliding to protect the surface. If the element cycles on and off, give the pan extra time to stabilize before adding delicate foods.
From new pan to lifelong performer: a realistic timeline
People often ask how long it takes for a cast iron skillet to achieve the “glide” everyone mentions. The answer depends on usage, but here is a realistic arc for a regularly used pan.
- Weeks 1–2: A protective film is present. You may need extra fat for delicate foods. Avoid long, acidic cooks. Two to three thin seasoning bakes help.
- Month 1: The color deepens and the feel changes. Searing improves, pan pizza releases with a nudge, and roasted potatoes leave fewer sticky spots.
- Month 3: A soft sheen appears. Eggs start behaving well if you preheat carefully and use a bit of fat. Cleaning feels easier, quicker, and less fussy.
- Year 1 and beyond: The skillet looks quietly glossy and cooks with reassuring consistency. Your routine is second nature: rinse, dry, oil, done.
By this point, most day-to-day tasks feel effortless. You’ll still run into the occasional sticky spot or orange freckle, but you’ll know exactly how to handle it without drama.
Troubleshooting quick reference
Use these short cues to identify likely causes and next steps. They turn “What now?” into a simple plan.
- Brown stains on towel after buffing: Too much oil was applied. Scrub gently, then re-season with ultra-thin coats.
- Orange flecks after a night on the counter: Residual moisture. Heat-dry after every wash; do one quick seasoning bake.
- More sticking than last month: Surface needs reinforcement or better preheat. Cook a fat-rich meal and give the pan more preheat time.
- Black crumbs flaking off: Heavy seasoning coats or uneven heat. Strip loose bits and rebuild with thin layers.
- Acrid smoke during seasoning: Coats were too thick or oil has a low smoke point. Use less oil and try a different neutral oil.
Keep this list handy the next time something feels off. Most issues are routine adjustments, not emergencies.
Sample routines for different cooking styles
Everyone cooks differently. Here are three realistic routines you can copy and adjust to your kitchen and schedule.
The minimalist
You own one 10-inch skillet and cook three nights a week. After each cook: rinse warm, brush, heat to dry, buff in a few drops of oil until dry-looking, cool on the stove. Once a month, do one seasoning bake—done.
The weeknight power cook
Your pan is in action four to five nights a week. Designate one surface-building meal weekly (roasted potatoes, pan pizza, a steak sear) so the film keeps improving without extra work. Keep a chainmail scrubber and scraper by the sink to make cleaning a 90-second task.
The weekend enthusiast
You experiment on Saturdays. Run a full inspection every few weeks, touch up dull spots with a quick seasoning cycle, and try an advanced cook like reverse-seared steak or crispy-skinned chicken thighs. You’ll get better food and a better surface at the same time.
When these routines feel natural, cast iron becomes set-and-forget cookware: strong, predictable, and ready for anything from cornbread to charred broccoli to skillet cookies.