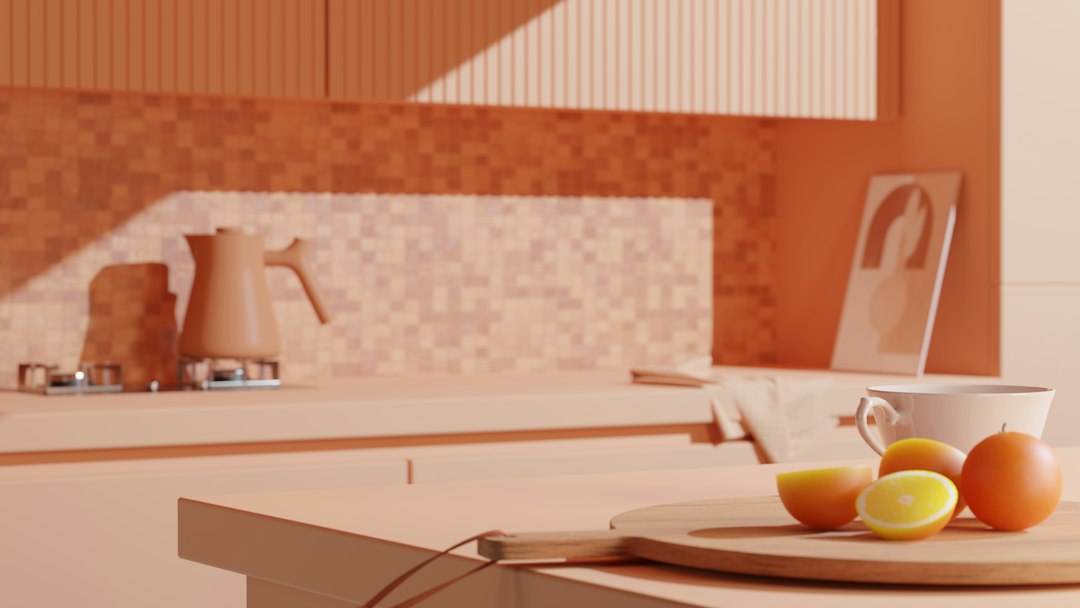
If you want a single playbook you can use every week, these healthy cooking techniques will help you make lighter, tastier meals without fuss, confusion, or a drawer full of gadgets you rarely touch.
healthy cooking techniques: Healthy cooking techniques: the essentials
Think of technique as your kitchen operating system. When you understand why a method works, you can swap ingredients, adjust timing, and still get reliable results. Here is the mindset that ties every method in this guide together.
- Heat control is flavor control. Gentle heat protects delicate proteins and greens. High heat creates browning, which adds depth and texture.
- Water and fat are carriers. Water moves heat efficiently for even results (steaming, poaching), and fat helps conduct heat and carry aromatic compounds (sautéing, roasting)—you can use less of it when you combine smart technique with bold seasoning.
- Season in layers. Salt at the right moment, use acids to brighten, and finish with fresh herbs or citrus to lift everything without relying on heavy sauces.
- Measure with your senses. Listen for a soft sizzle versus a harsh crackle, watch for color change, smell for sweetness or nutty notes as browning develops.
Across the next twelve sections, you will get clear steps, temperature cues, and practical tools, plus variations and weeknight applications. Pick two or three methods to practice this week, then rotate in another two next week.
1) Stir-frying smarter: crisp-tender vegetables, juicy protein
Stir-frying is more than tossing food in a hot pan. It is a method that uses high heat and constant movement to achieve seared edges and vibrant textures with minimal oil. The key is preparation and sequencing.
Tools
- 12–14 inch carbon-steel wok or a wide stainless skillet
- High-smoke-point oil such as avocado or refined peanut, measured by teaspoon
- Fish spatula or wok spatula, plus a bowl for sauce
Prep and sequence
- Cut ingredients into uniform, bite-size pieces so they cook evenly.
- Blot moisture from proteins and vegetables; surface dryness promotes browning.
- Mix a simple sauce: 1 teaspoon soy or tamari, 1 teaspoon rice vinegar or citrus, 1 teaspoon water or stock, 1/2 teaspoon cornstarch, aromatics like ginger and garlic.
Technique
- Preheat the empty pan over medium-high until a drop of water skitters.
- Add 1–2 teaspoons oil and swirl; add aromatics for 10–15 seconds.
- Cook protein first to 80% done, remove, then stir-fry vegetables from firm to tender (carrots, broccoli, snap peas).
- Return protein, add sauce, and toss 30–45 seconds until glossy.
Flavor ideas
- Ginger garlic chicken with broccoli and scallions
- Tofu, bell pepper, and snap pea with orange zest
- Shrimp, asparagus, and chili flakes with lime
Common mistake to avoid: overcrowding. Cook in batches so steam does not build up and soften the sear.
2) Steaming: clean flavor, vivid color, zero scorching
Steaming uses vapor to cook food gently, preserving color and texture while avoiding scorching. Because the food never sits in water, delicate flavors remain clear. You can steam in stacked bamboo baskets, a metal rack inside a pot, or an electric steamer.
Tools
- Steamer basket with lid, saucepan or wok, parchment or cabbage leaves to prevent sticking
- Timer and a thermometer for fish fillets
Technique
- Bring 1–2 inches of water to a steady simmer; avoid a rolling boil.
- Arrange food in a single layer with slight gaps for vapor flow.
- Cover and steam until just done: fish 6–10 minutes depending on thickness; vegetables 2–8 minutes.
- Finish with aromatics: drizzle with scallion-ginger oil, citrus, or a spoon of light soy plus sesame seeds.
Applications
- Steamed salmon with lemon, dill, and capers
- New potatoes steamed, then crushed with olive oil and chives
- Bok choy with garlic and a squeeze of lime
Pro tip: to keep greens bright, steam until just tender, then cover off-heat for 1 minute to finish gently.
3) Poaching and gentle simmering: moisture-forward and forgiving
Poaching cooks food in barely trembling liquid. The liquid can be stock, coconut milk, tomato water, or even olive oil for a shallow, aromatic bath. Gentle simmering is slightly hotter, with tiny bubbles around the edges.
Tools
- Wide saucepan or high-sided skillet
- Slotted spoon, thermometer, and aromatics such as bay, citrus peel, peppercorns
Technique
- Heat liquid to 160–185°F for poaching (barely steaming), 185–205°F for a gentle simmer.
- Slide in protein or vegetables; keep liquid below a boil.
- Cook until just opaque or tender; rest briefly before serving.
- Reduce some of the liquid for a light sauce; finish with lemon and fresh herbs.
Applications
- Chicken breasts poached in ginger-scallion stock, sliced for salads
- Eggs poached in tomato-chili sauce for a skillet supper
- Pears poached in spice tea with orange peel
Flavor tip: acids like vinegar or citrus in the poaching liquid brighten results without heavy sauces.
4) Roasting and sheet-pan suppers: high heat, low effort
Roasting converts natural sugars to toasty, complex flavors while driving off surface moisture for crisp edges. Sheet-pan dinners let you roast protein and vegetables on one pan with staggered timing.
Tools
- Heavy-duty sheet pan, wire rack, parchment, instant-read thermometer
- Tongs and a bowl for tossing vegetables in minimal oil
Technique
- Preheat to 400–450°F; hot air is the secret to browning.
- Toss vegetables with 1–2 teaspoons oil per sheet; season with salt, pepper, and spices.
- Start dense vegetables first (potatoes, carrots); add quicker items (broccoli, zucchini) later.
- Place protein on a rack to keep bottoms crisp and cook until just done.
Flavor ideas
- Smoky paprika cauliflower with chickpeas and lemon yogurt
- Chicken thighs on a rack over carrots and onions with thyme
- Roasted salmon with cherry tomatoes, olives, and oregano
Maintenance note: keep one pan for savory foods and another for baked goods to avoid flavor transfer.
5) Sautéing with less oil: clear browning, quick results
Sautéing uses direct contact with a hot pan and a modest amount of fat to build a sear fast. You can get excellent results using teaspoons rather than tablespoons when your pan is preheated and your food is dry.
Tools
- Stainless or cast-iron skillet, paper towels, and a small squeeze bottle for controlled pours
Technique
- Heat the pan until water droplets dance; add 1–2 teaspoons oil.
- Add food in a single layer and do not move it for 1–3 minutes; movement too soon tears the crust.
- Flip once; finish with a splash of stock, wine, or lemon to release fond and form a quick pan sauce.
Applications
- Mushrooms sautéed with thyme and garlic, deglazed with sherry
- Thin pork cutlets with lemon-caper pan sauce
- Green beans with chili, soy, and sesame
Cleanup tip: after the pan cools slightly, add water, bring to a simmer, and scrape gently to lift browned bits. Then wash normally.
6) Grilling and broiling: char, smoke, and speed
Grilling outdoors and broiling in the oven apply high radiant heat from below or above. That heat caramelizes surfaces quickly, so timing and distance matter. You can create big, satisfying flavors with short cook times and simple marinades.
Tools
- Grill or oven broiler, adjustable rack height, and a brush for grates
- Instant-read thermometer, long tongs, and a tray
Technique
- Preheat thoroughly. Clean and oil grates lightly to minimize sticking.
- Use direct heat for thin cuts and quick-cooking vegetables; use indirect heat for thicker cuts.
- Keep a cool zone; move food if flare-ups occur.
- Rest proteins for 5–10 minutes to redistribute juices.
Flavor ideas
- Broiled salmon with miso glaze and sesame
- Grilled vegetable platter: zucchini, peppers, onions, mushrooms with herb vinaigrette
- Chicken skewers marinated with yogurt, garlic, and spices
Safety note: keep sauces with sugar for the last minutes to reduce charring.
7) Pressure cooking and multicooker mastery
Modern multicookers and stovetop pressure cookers trap steam to cook foods faster. This method is ideal for beans, whole grains, tough vegetables, and stews, delivering tender results with less active time.
Tools
- Multicooker with sauté function or a stovetop pressure cooker
- Scale or measuring cups, and natural release patience
Technique
- Rinse beans and grains; add aromatics like onion, garlic, and bay leaves.
- Use precise liquid ratios (for brown rice, 1 cup rice to 1 1/4 cups water under pressure is a good starting point).
- Cook under pressure according to the manual; allow natural release for starchy foods to avoid sputtering.
Applications
- Brothy beans with olive oil, lemon, and herbs
- Farro with sautéed mushrooms and parsley
- Vegetable stew finished with citrus and fresh greens
Flavor booster: toast spices in the pot on sauté mode before adding liquid; the aroma will carry through the dish.
8) Air frying: convection crisp with tiny amounts of oil
Air fryers are compact convection ovens that move hot air rapidly around food to create crisp surfaces. Because the chamber is small and the fan is strong, you can get golden results using very little oil.
Tools
- Air fryer with a clean basket and a spray bottle of oil
- Wire rack for cooling to keep bottoms crisp
Technique
- Preheat briefly. Arrange food in a single layer with space between pieces.
- Lightly mist with oil; shake halfway through to re-expose surfaces.
- Watch closely in the last minutes; air fryers run hot and fast.
Applications
- Cauliflower florets with smoked paprika
- Chicken drumsticks with spice rub
- Sweet potato wedges finished with lime and cilantro
Care tip: after cooking, wipe out crumbs, then wash the basket; lingering bits increase smoke and uneven browning.
9) Slow cooking: low heat, deep comfort
Slow cookers excel at low-and-slow braises and soups. They free up your hands while coaxing flavors to mingle. Because evaporation is minimal, season conservatively at the start and adjust at the end.
Tools
- Slow cooker, skillet for initial browning, ladle, and a tasting spoon
Technique
- Brown aromatics and proteins on the stove for deeper flavor before adding to the slow cooker.
- Use less liquid than a stovetop recipe because the lid traps moisture.
- Layer ingredients: root vegetables on the bottom, then proteins, then quick-cooking greens near the end.
Applications
- Tomato-lentil soup finished with red wine vinegar
- Turkey chili with beans, cocoa, and cumin
- Root vegetable ragù topped with parsley and lemon zest
Make-ahead idea: use your slow cooker to batch-cook beans, then freeze in 1–2 cup portions for quick weeknight bowls.
10) Braising greens and vegetables: silky, not soggy
Braising sits between sautéing and stewing. You cook ingredients briefly in fat to develop flavor, then add a small amount of liquid, cover, and simmer gently until tender. This method is an easy path to silky greens and flavorful vegetables that reheat well.
Tools
- Wide sauté pan with lid, wooden spoon, and a measuring cup
Technique
- Sweat aromatics in 1–2 teaspoons oil until fragrant.
- Add hardy greens or vegetables and toss to coat.
- Pour in a splash of stock, water, or crushed tomatoes; cover and cook until just tender.
- Uncover to evaporate excess liquid; finish with citrus and fresh herbs.
Applications
- Chard with garlic and lemon
- Cabbage with caraway and apple
- Carrots with cumin and orange
Balance tip: if a braise tastes flat, add acid, not more salt. Lemon juice or vinegar can reveal sweetness and complexity already in the pan.
11) Build big flavor without heaviness: season like a pro
Bold flavor is the backbone of lighter cooking. The goal is to use a spectrum of salt, acid, heat, umami, sweetness, and freshness so food tastes complete without relying on heavy sauces or excess fat.
Layering strategy
- Salt early and lightly. A small pinch during sautéing penetrates; add another pinch at the end if needed.
- Use acids to brighten: lemon, lime, vinegar, tamarind, pomegranate molasses. Add near the end to retain their sparkle.
- Fresh elements at the finish: herbs, scallion greens, grated garlic, citrus zest, or a spoon of yogurt.
- Umami boosters: mushrooms, tomato paste, miso, anchovy, Parmesan rind simmered in a soup.
- Sweetness to balance: roasted carrots, a few raisins in a braise, or a drizzle of balsamic reduction.
Practical flavor formulas
- Lemon-herb finishing oil: 2 tablespoons olive oil, zest of 1 lemon, chopped parsley; spoon over fish or greens.
- Yogurt-chili sauce: 1/2 cup yogurt, grated garlic, chili flakes, squeeze of lime; serve with roasted vegetables.
- Miso-sesame glaze: 1 tablespoon miso, 1 teaspoon sesame oil, 1 teaspoon rice vinegar, splash of water; brush on salmon or eggplant.
Tasting method: taste, adjust one variable, taste again. Ask yourself: Does it need brightness (acid), backbone (salt), or freshness (herbs)? Repeat until it sings.
12) Batch cooking and smart storage: cook once, enjoy all week
Mastering technique is half the story; the other half is applying it in a weekly rhythm so good food shows up even on busy nights. Batch cooking and smart storage make your kitchen feel supportive rather than demanding.
Core batch moves
- Cook a pot of grains (brown rice, farro, quinoa) and a pot of beans under pressure or simmered until tender.
- Roast two sheet pans of mixed vegetables with different spice profiles.
- Poach a pound of chicken or tofu and chill for slicing into salads and wraps.
- Make a flavor trio: bright vinaigrette, aromatic herb oil, and a versatile yogurt sauce.
Storage checklist
- Cool foods quickly and store in shallow containers to preserve texture.
- Label with name and date; use clear containers so you see what you have.
- Keep dressings and sauces separate from delicate greens until serving.
- Reheat gently with a splash of water or stock to restore moisture; crisp in a skillet or air fryer when needed.
Mix-and-match bowls
- Base: grains or greens
- Protein: beans, tofu, chicken, fish
- Vegetables: roasted, steamed, or fresh
- Finish: a pickled element, herbs, and a squeeze of citrus
Menu board idea: list five options—stir-fry night, sheet-pan night, soup night, sandwich night, and big salad night. Assign a technique to each and rotate every week.
Tool care and maintenance for reliable results
Healthy cooking rests on trustworthy tools that behave the same way every time. A sharp knife, responsive pans, and a thermometer remove guesswork and help you use less fat and salt because you can hit doneness precisely and let ingredients shine.
Knife care
- Hone frequently and sharpen when honing no longer restores the edge.
- Hand wash and dry immediately; store in a block, on a magnetic strip, or in guards.
Pans and baking sheets
- Preheat pans empty to reduce sticking; add oil only when hot.
- For cast iron, keep a thin seasoning layer by wiping with a small amount of oil while warm.
- Replace warped or thin sheet pans; they brown poorly and burn quickly.
Thermometers and timers
- Use a fast thermometer for proteins and bakes; it removes guesswork.
- Set timers, even for short tasks, to avoid overcooking and preserve texture.
Pantry and fridge setup that supports technique
Technique works best when your pantry supports it. Stock versatile ingredients that pair naturally with each method so you can improvise confident meals from what you have on hand.
Stock this
- Grains and legumes: brown rice, farro, quinoa, oats, lentils, chickpeas, black beans
- Canned and jarred: tomatoes, roasted peppers, olives, capers, coconut milk, tuna
- Seasonings: kosher salt, black pepper, smoked paprika, cumin, curry powder, chili flakes, oregano
- Acids: red wine vinegar, rice vinegar, apple cider vinegar, lemons, limes
- Fats: extra-virgin olive oil, avocado oil, a neutral spray oil
- Fresh boosters: scallions, garlic, ginger, cilantro, parsley
Technique pairings
- Stir-fry: soy or tamari, rice vinegar, ginger, garlic, sesame seeds
- Steam: citrus, scallions, dill, capers
- Poach: bay leaves, peppercorns, lemon peel, thyme
- Roast: smoked paprika, cumin, oregano, garlic
- Sauté: shallot, thyme, sherry vinegar
- Air fry: chili powder, garlic powder, lime
Weeknight playbook: pick a technique, then a template
To turn knowledge into dinner, use simple templates. Start with a method, add a protein, choose a vegetable, then finish with a flavor move. Here are five reliable templates you can memorize and repeat.
Templates
- Stir-fry bowl: protein + crunchy veg + greens + ginger-garlic + soy-lime sauce + rice
- Sheet-pan supper: protein on a rack + mixed vegetables tossed with spices + lemon at the end
- Brothy beans: pressure-cooked beans + sautéed aromatics + greens + chili + citrus
- Poached fish: shallow stock + aromatics + fish + lemon-herb finishing oil + crusty bread or grain
- Cripsy air-fryer veg: mixed vegetables + spice rub + light oil mist + yogurt-chili drizzle
If you want more templates and step-by-step guides, visit the free resources at Healthy Cooking Hub where technique articles, checklists, and seasonal meal ideas are updated regularly.
Troubleshooting: when things go sideways
Every cook hits snags. Use these quick fixes to steer a dish back on course without piling on richness or salt.
- Vegetables came out soft: blast in a hot pan or air fryer for 1–3 minutes to restore edges.
- Pan sauce tastes dull: add acid and simmer 30 seconds; a squeeze of lemon often makes the difference.
- Food stuck to the pan: wait another minute before turning next time; proteins release naturally when the crust forms.
- Too spicy: add a dairy element like yogurt, or serve with a cooling salad; sweetness from roasted carrots can also balance heat.
- Roast did not brown: preheat longer, use a lower-sided pan, and ensure ingredients are dry before oiling.
Putting it together: a 7-day technique plan
Here is a simple path to practice the methods above over one week. Adjust to what you have and what you like.
- Day 1: Stir-fry tofu with broccoli and snap peas; rice on the side.
- Day 2: Sheet-pan salmon with cherry tomatoes and olives; lemon-herb oil to finish.
- Day 3: Pressure-cooked beans with sautéed greens; chili flakes and citrus.
- Day 4: Poached chicken sliced over a big salad with vinaigrette.
- Day 5: Air-fried cauliflower and sweet potato wedges with yogurt-chili sauce.
- Day 6: Slow-cooker tomato-lentil soup; crusty bread and a green salad.
- Day 7: Grilled vegetables and chicken skewers with herb vinaigrette.
By the end of the week, you will have repeated heat cues, seasoning moves, and finishing habits that make lighter cooking feel second nature.
Your personal technique toolkit
Print or save this checklist so you can scan it before you start cooking. It is less about perfection and more about consistency.
- Read the whole recipe or template; gather the tools.
- Preheat pans and oven properly; dry ingredients.
- Use teaspoons of oil and add flavor with acids, herbs, and spice.
- Watch and listen for doneness cues rather than only relying on time.
- Taste, adjust, and finish with freshness.
With these healthy methods, the same groceries can become bright, satisfying meals. Start with one new technique tonight and follow the sensory cues in this guide. You will cook with more confidence, more flavor, and far less effort than you might expect.